
Quick start
In about ten minutes you will track a book someone recommended to you: a Person Object, a Book Object that links to them, and a Task to return it. Along the way you will see what makes Lar different from a folder of notes. Every note has a Type with its own fields, and every link shows up on both ends.
You need Lar open in a browser at app.lar.io or in the desktop app. The steps and screenshots follow the desktop layout. On a narrow screen, navigation moves into the floating bar and the More panel.
1. Open a workspace
Section titled “1. Open a workspace”A workspace holds your Objects, Types, search index, settings, and encryption key, all on your device.
- In the browser, the Welcome to Lar screen offers Start writing under I’m new here, and Sign in or Use a pairing or recovery code under I already use Lar. To try Lar, choose Start writing. You can add device unlock or a passphrase later in Settings → Security. Install & availability explains each choice.
- On desktop, create a workspace when prompted and give it a name you will recognize in the workspace switcher.
Leave sync on This device only while you learn the app. You can switch to Peer-to-peer, Cloud, or Self-hosted server later in Settings → Sync.
A new workspace may offer a guided tour with Build a guided workspace and Set up on my own. The tour adds a starter note, project, reference, and task, and you can skip a step or choose End tour at any time. Everything it adds is ordinary content you can edit or delete. The steps below work either way.
2. Add the Person and Book Types
Section titled “2. Add the Person and Book Types”Every Object has exactly one Type, and the Type decides which properties and relations it has. A fresh workspace starts with no Types in the sidebar, so add two ready-made ones:
- In the sidebar, press + next to Object types. The Add new object type gallery opens.
- Select Person, then choose Create object type.
- Press + next to Object types again, select Book, and choose Create object type.
Both Types now appear under Object types. A Book comes with Author, Rating, Recommended by, and Medium properties. You can change any of them later.
3. Create a Person and a Book
Section titled “3. Create a Person and a Book”- Choose New at the top of the sidebar, then Person. On desktop you can also select the Type in the sidebar and press Ctrl+N. The new Object opens right away.
- Type a name as the title, such as
Maya Chen, and set Category to Friend. - Choose New → Book and title it
Dune. Fill in Author and Rating.
Changes save on your device as you type. The save indicator shows Saving… and then Saved on this device.
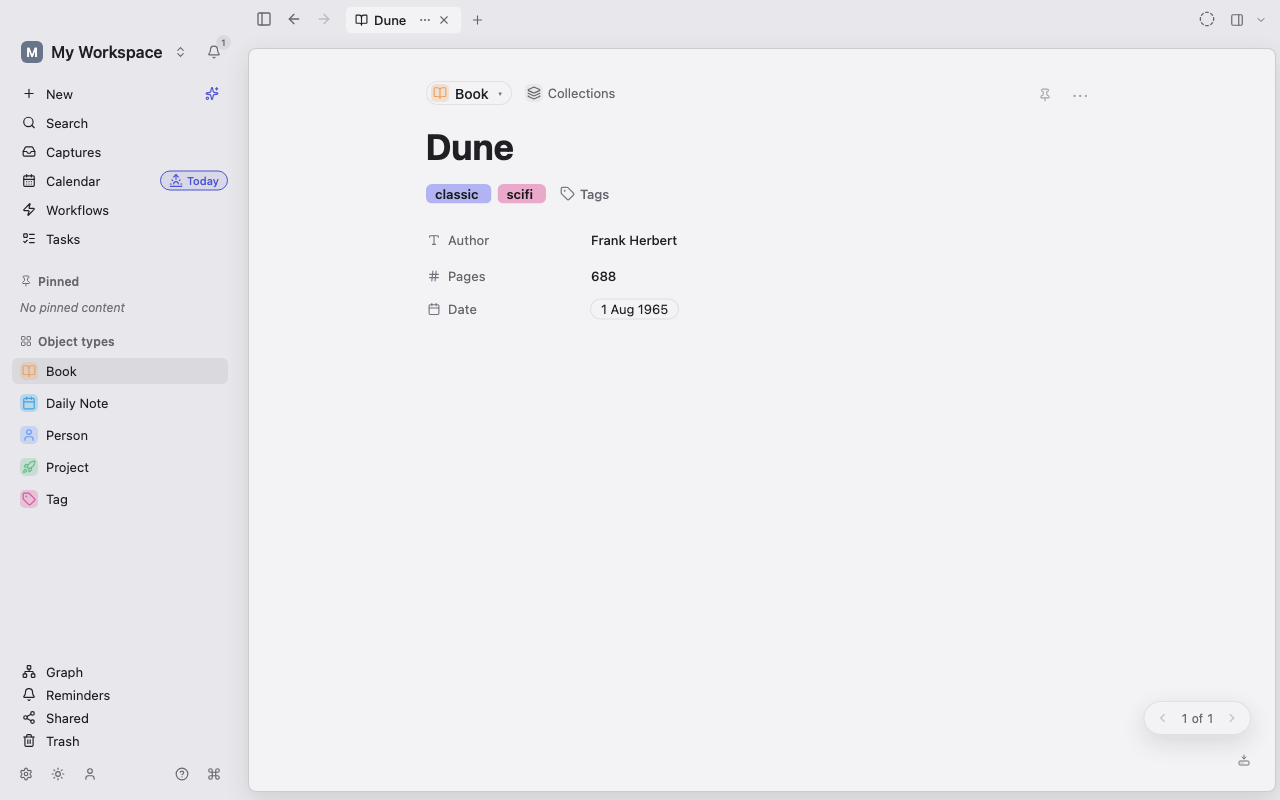
4. Link them and see the backlink
Section titled “4. Link them and see the backlink”Below the properties is the body, a block editor for free-form writing.
- In the Dune body, type
Recommended by [[Mayaand pick Maya Chen from the list. The text becomes a link to the Person. - On the same line, type
#scifiand a space. Lar creates a Tag named scifi, or reuses it if it exists, and tags the Book. - Open Maya Chen. In the side panel, Details lists Dune under Linked from. Press Ctrl+\ if the side panel is hidden.
That is a backlink. You never edited Maya’s page, yet she now knows about every Object that mentions her.
5. Add a Task
Section titled “5. Add a Task”- Choose Tasks in the sidebar, then New task….
- Type
Return Dune to Maya, set a due date, and choose Add task.
The Task appears in Tasks and on the Calendar on its due date.
6. Find it again
Section titled “6. Find it again”- Press Ctrl+K, or choose Search in the sidebar, to open the command palette. Type
duneto jump to the Book. With nothing typed, the palette lists recent Objects. - For filters by Type or tag, choose Open Search in the palette to reach the full Search page. You can save a search there with Save as Query.
- Click Book under Object types to see every Book. Switch the layout to Table (Ctrl+2) to compare their properties side by side.
Next steps
Section titled “Next steps”- Learn the layout in Tour the app.
- Design your own Types in Objects and Object Types, and link them with Relations and backlinks.
- Ask precise questions, such as
type:Book tag:scifi, with the query language. - Bring existing notes across with Import & export.